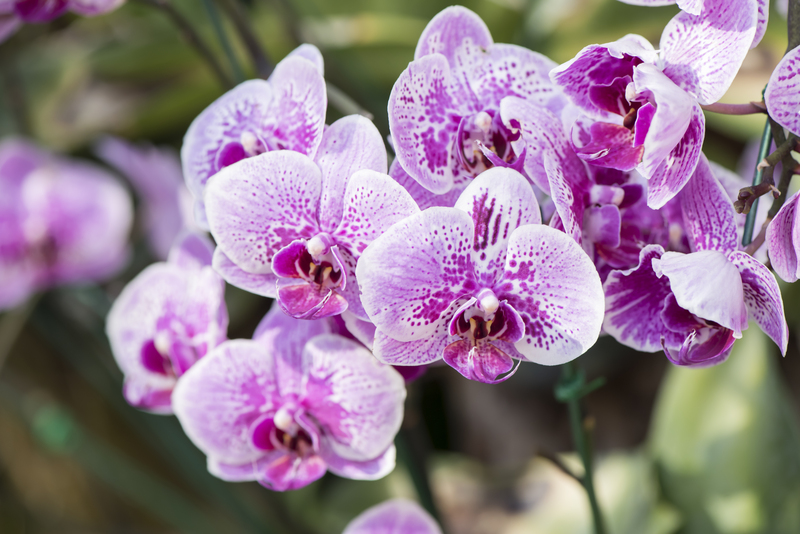
Master the Art of Nurturing Your Orchids
Posted on 14/08/2025
Master the Art of Nurturing Your Orchids
Orchids are stunning, exotic plants that captivate people with their intricate blooms and delicate allure. However, many beginners shy away from orchid care, believing that these fascinating beauties are difficult to nurture. In truth, nurturing orchids can be exceptionally rewarding and surprisingly straightforward if approached with the right knowledge and mindset. In this comprehensive guide, you will learn how to expertly care for orchids, unlock their full blooming potential, and enjoy their beauty all year round.

Understanding the Basics: The World of Orchids
With over 25,000 species and more than 100,000 hybrids, orchids form one of the largest families of flowering plants. Whether you have a classic Phalaenopsis (moth orchid), a flamboyant Cattleya, or a rare Paphiopedilum (slipper orchid), the following nurturing tips will help you provide the ideal environment and support your orchids' unique needs.
Why Orchids Make Remarkable Houseplants
- Striking Appearance: Orchids display vibrant, long-lasting flowers that often bloom for months.
- Compact Growth: Many orchids are perfect for small spaces, thriving in pots or hanging baskets.
- Air Quality Benefits: Like most houseplants, orchids help purify indoor air by absorbing toxins and releasing oxygen.
Mastering the art of orchid nurturing begins with understanding how these unique plants thrive in their natural habitats and applying those lessons at home.
Choosing the Right Orchid: Set Yourself Up for Success
Popular Orchid Types for Home Growers
- Phalaenopsis (Moth Orchids): Easy-care, beginner-friendly, with enchanting moth-shaped blooms.
- Dendrobium: Robust and adaptable, these orchids bloom in vibrant clusters.
- Cattleya: Known for their fragrant, large, and colorful blossoms.
- Oncidium: Also called "dancing lady" orchids for their frilly, golden-yellow flowers.
Tip: If you're new to orchids, start with Phalaenopsis or Dendrobium varieties, as they are more forgiving of minor care mistakes and adapt well to indoor environments.
Creating the Ideal Environment for Orchids
Orchids are native to diverse climates, from tropical rainforests to temperate regions. Regardless of their origin, most orchids grown as houseplants share similar preferences for light, temperature, humidity, and air circulation.
1. Light Requirements
- Bright, Indirect Light: The majority of orchids prefer filtered sunlight. East- or west-facing windows are ideal, or use a sheer curtain to diffuse direct sunlight.
- Leaf Color Clues: Healthy orchid leaves should be bright green. Dark green suggests insufficient light, while yellow or reddish leaves indicate excessive sun exposure.
- Artificial Lighting: Supplemental grow lights can be used if natural light is limited, especially in winter months.
Pro Tip:
Rotate your orchids weekly for even light exposure and balanced growth.
2. Temperature and Humidity
- Temperature Range: Most orchids thrive in daytime temperatures of 65-80?F (18-27?C) and nighttime temperatures of 55-65?F (13-18?C).
- Humidity: Orchids prefer 40-70% humidity. Room humidifiers, pebble trays, or regular misting will help maintain optimal moisture levels.
- Avoid Drafts: Keep orchids away from cold drafts, heating vents, and air conditioners.
3. Air Circulation
Gentle air movement prevents disease and fungal growth. Place a small fan nearby to keep the air fresh (but never blowing directly onto the plants).
The Right Orchid Potting Mix
Orchids are not grown in regular potting soil; their roots crave air and proper drainage. The best orchid potting mixes mimic the loose, barky conditions of their natural habitat:
- Fir bark: The most common base for orchid mixes.
- Sphagnum moss: Retains moisture but still allows for breathability.
- Perlite or charcoal: Improves drainage and prevents compaction.
- Coconut husk, lava rock, or tree fern fiber for additional texture and drainage.
Repotting orchids every 1-2 years is essential to refresh the growing medium and prevent root rot.
Watering Orchids: The Art of Balance
Proper watering is the heart of nurturing your orchids. Overwatering is the most common cause of orchid distress, leading to root rot. On the other hand, underwatering can cause desiccation and stunted growth.
How to Water Orchids Correctly
- Check the Medium: Water only when the top inch of the potting mix is dry to the touch.
- Saturate, Don't Soak: Water thoroughly, letting it drain completely so the roots are moist but not sitting in water.
- Frequency: Typically, water once a week in warm months and every 10-14 days in cooler periods. Adjust for humidity and pot size.
- Water Quality: Use room temperature, non-softened water. Rainwater or distilled water is ideal for sensitive orchids.
Never let water sit in the crown of an orchid, especially with Phalaenopsis, as this can lead to crown rot.
Signs of Watering Issues
- Underwatered orchids: Wrinkled, leathery leaves and shriveled roots.
- Overwatered orchids: Mushy roots, yellowing leaves, and a musty smell.
Feeding Your Orchid: Fertilizing for Success
To master orchid nurturing, you must feed these exotic plants correctly. Orchids are light feeders, but they do require a steady supply of nutrients, especially during periods of active growth and blooming.
Orchid Fertilization Tips
- Balanced fertilizer: Use a balanced, water-soluble orchid fertilizer (20-20-20) or a formula specific to your orchid's needs.
- Quarter-strength: Apply diluted to one-quarter the recommended strength with every other watering during growing season (spring and summer).
- Flush the Medium: Once a month, rinse the potting mix with plain water to prevent salt buildup.
- Resting Periods: Reduce fertilizing during fall and winter, when growth slows.
Remember: Fertilize "weakly, weekly." More fertilizer won't benefit your orchid and may do harm.
Orchid Bloom Care: Encouraging and Extending Blossoms
The art of nurturing your orchids truly shines when you coax beautiful blooms year after year. Proper care before, during, and after flowering ensures abundant blossoms and plant health.
Tips to Trigger Orchid Blooming
- Light: Move your orchid closer to a bright window after the rest period to spur budding.
- Temperature swings: Exposure to cooler night temperatures (55-60?F/13-16?C) for a few weeks can help induce flowering, especially in Phalaenopsis and other hybrids.
- Correct feeding: Use a "bloom booster" orchid fertilizer higher in phosphorus during fall.
Post-Bloom Orchid Care
- Prune spent spikes: Once blooming ends, cut the flower spike above a node to encourage side branching, or remove entirely if the stem turns brown.
- Rest period: Allow your orchid to rest after blooming with slightly less water and no fertilizer.
With patience and attentive care, most orchids bloom at least once a year, some even more frequently!
Pruning, Training, and Staking Orchids
Orchids rarely need serious pruning, but light maintenance encourages both attractiveness and productivity. Use sterilized scissors or orchid shears for any pruning cuts.
- Remove dead leaves, spent flower spikes, and any damaged roots during repotting.
- Stake tall flower spikes: Most tall spikes benefit from gentle staking to keep blooms upright and prevent snapping.
- Clip faded blooms to direct the orchid's energy into new growth.
Common Orchid Problems and Solutions
Pest Issues
- Mealybugs and scale: Remove with alcohol-dipped cotton swabs; treat with insecticidal soap or neem oil.
- Spider mites: Increase humidity and use miticides if necessary.
- Slugs and snails: Remove manually; use safe bait if needed.
Disease Prevention
- Root rot: Avoid overwatering and use well-draining medium.
- Bacterial/fungal leaf spots: Remove affected leaves; increase air movement and use suitable fungicides.
- Virus: Isolate and dispose of infected plants, as there is no cure.
Routine inspections and swift intervention are your best defense against orchid pests and diseases.
Repotting Orchids for Continued Vitality
Regular repotting is another important part of orchid nurturing. Signs your orchid needs repotting include crowded roots, broken-down medium, or loss of vigor.
Repotting Steps
- Gently remove the orchid from its pot.
- Trim away any mushy or dead roots.
- Position the orchid in fresh orchid mix, spreading the roots evenly.
- Water sparingly at first to help the plant settle.
Most orchids benefit from repotting every 1-2 years, preferably right after blooming or when new growth appears.
Expert Tips for Mastering Orchid Nurturing
- Label your orchids: Track their variety, watering, and feeding dates.
- Join orchid societies or online forums to learn from experienced growers.
- Observe and adapt: Each orchid is unique. Watch for changes and adjust care as needed.
- Don't be discouraged by setbacks: Orchid nurturing is a journey--patience is rewarded with breathtaking blooms!

Growing Orchids: Beyond the Basics
Once you become comfortable with the fundamentals, consider expanding your orchid collection or experimenting with propagation methods, such as growing from keikis (baby plants) or dividing mature clumps. Some enthusiasts even try cross-pollination to create new hybrids--there's always more to discover in the world of orchid nurturing!
Conclusion: Savor the Joy of Orchid Mastery
Mastering the art of nurturing your orchids isn't just about following rules--it's about forming a relationship with each plant, observing its response, and enjoying its stunning rewards. With knowledge, a little patience, and the right techniques, anyone can become a successful orchid grower. Whether you're cultivating a single moth orchid on your windowsill or building a lush orchidarium, these remarkable plants will bring elegance, color, and wonder into your life.
So, put these expert tips into practice, and watch your orchids thrive and bloom like never before!
Latest Posts
Transforming Organic Waste into Soil Fertility
Beginner's Guide to Thriving Herb Gardens
Designing a Magical Garden for Young Explorers

